CHAPTER 4
PD Arrays I: Gaps and Order Blocks
PD arrays are the priced zones where institutional orders live. Once you can mark them, your entry stops being a guess and becomes a limit order at a defined price.
4.1The PD Array Family
| Array | Definition in one line |
|---|---|
Fair Value Gap | A three-candle gap where almost no trade occurred |
OB | Last opposing candle before displacement |
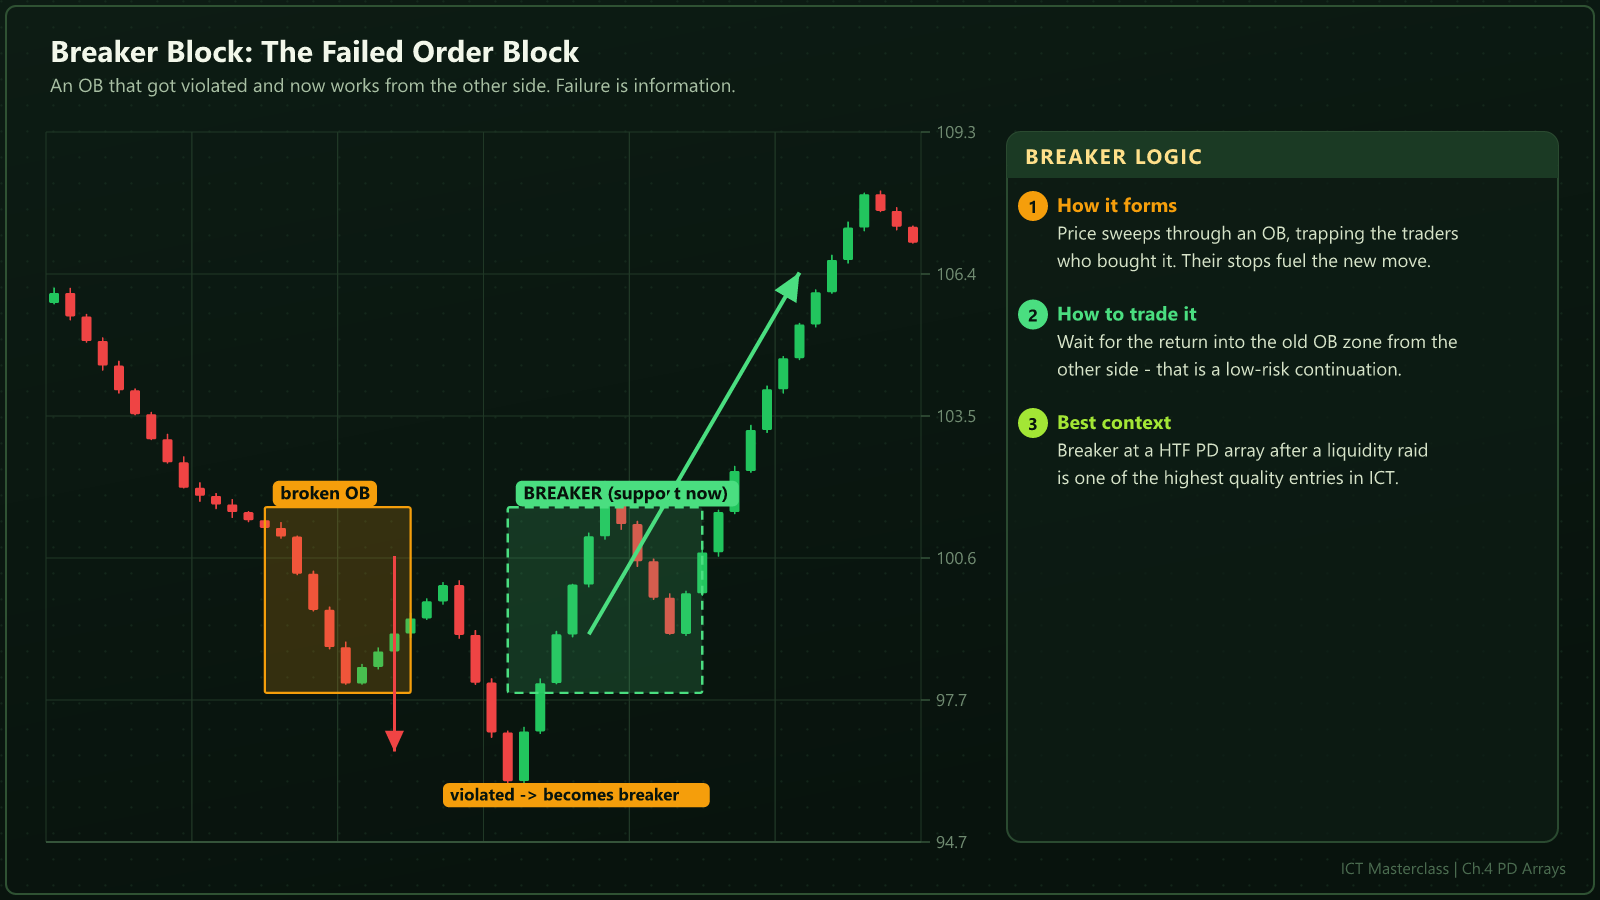
Breaker | An OB that failed and now works from the other side |
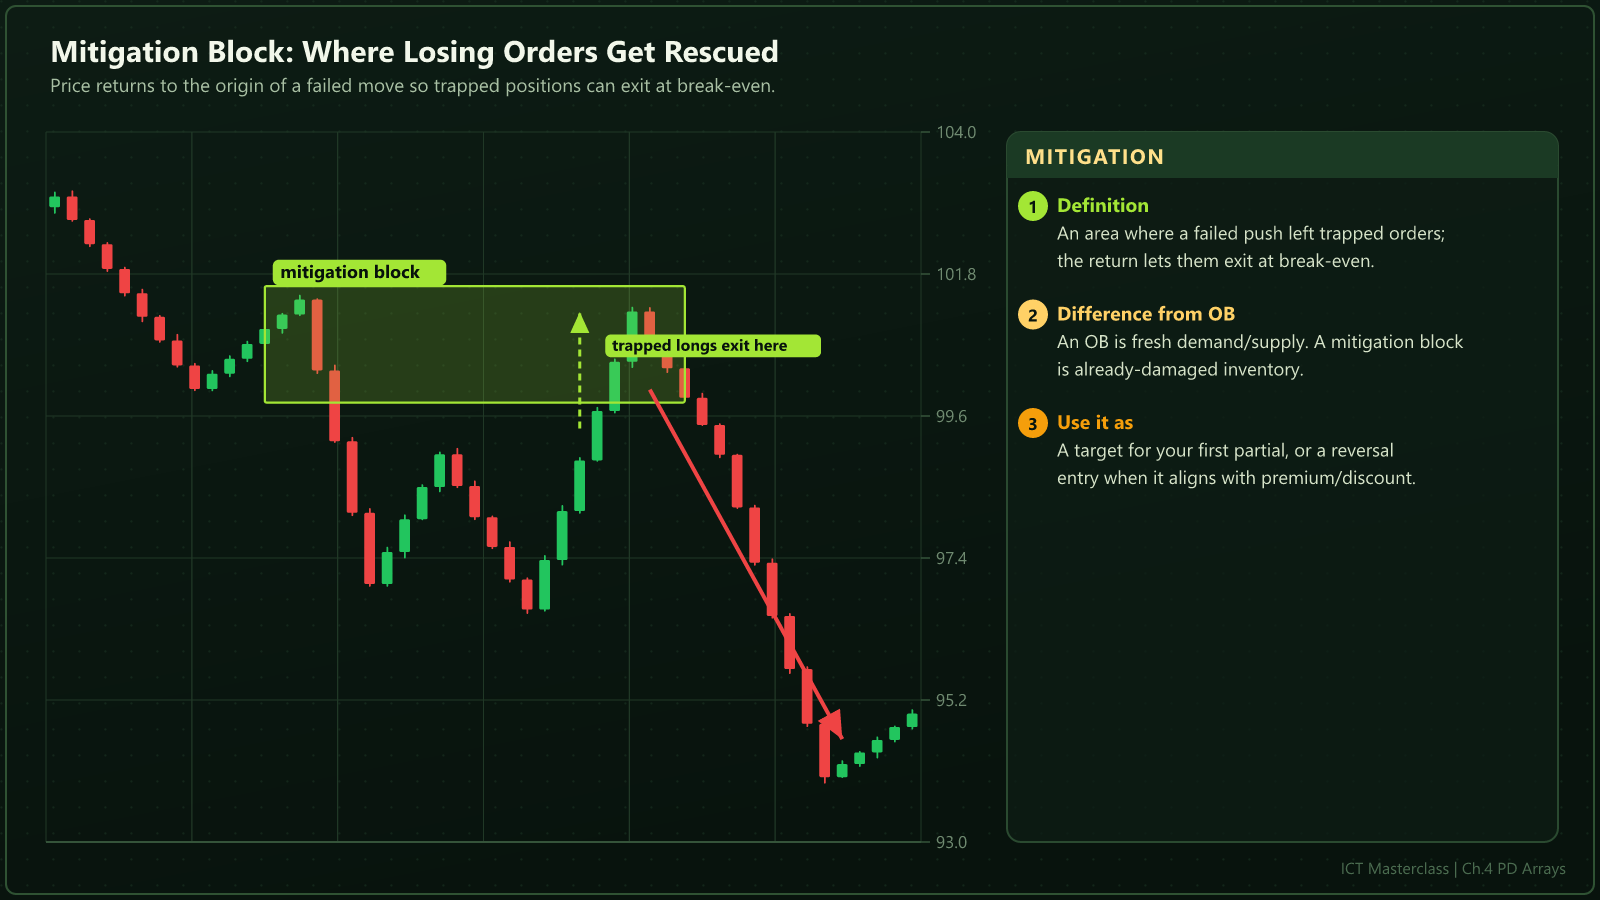
Mitigation | Where trapped orders are allowed to exit |
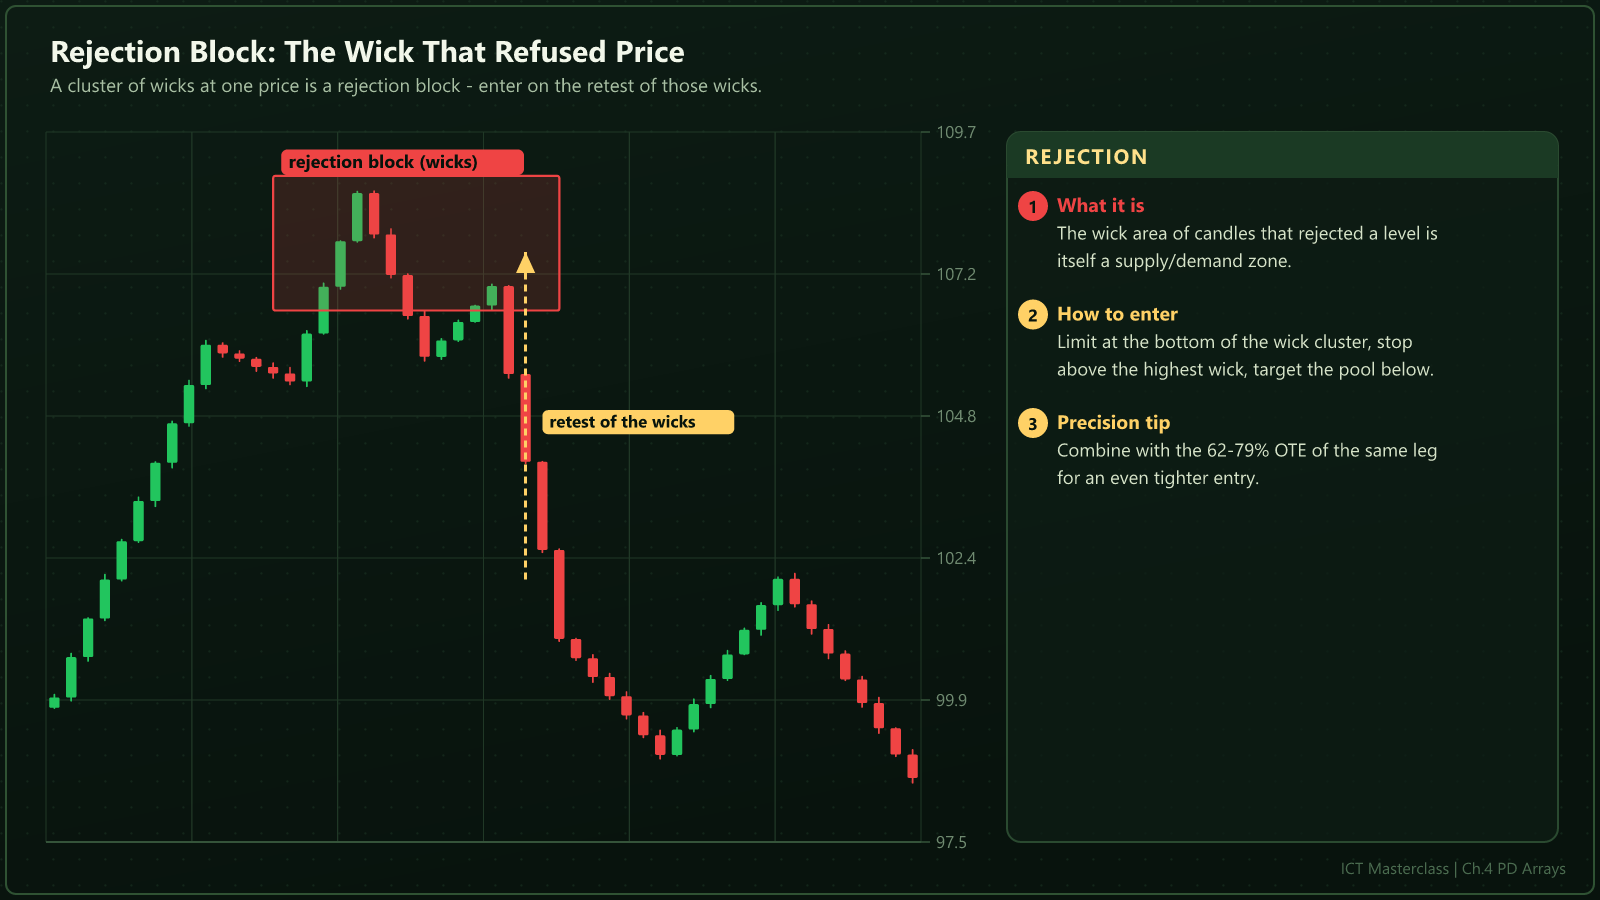
Rejection | A cluster of long wicks |
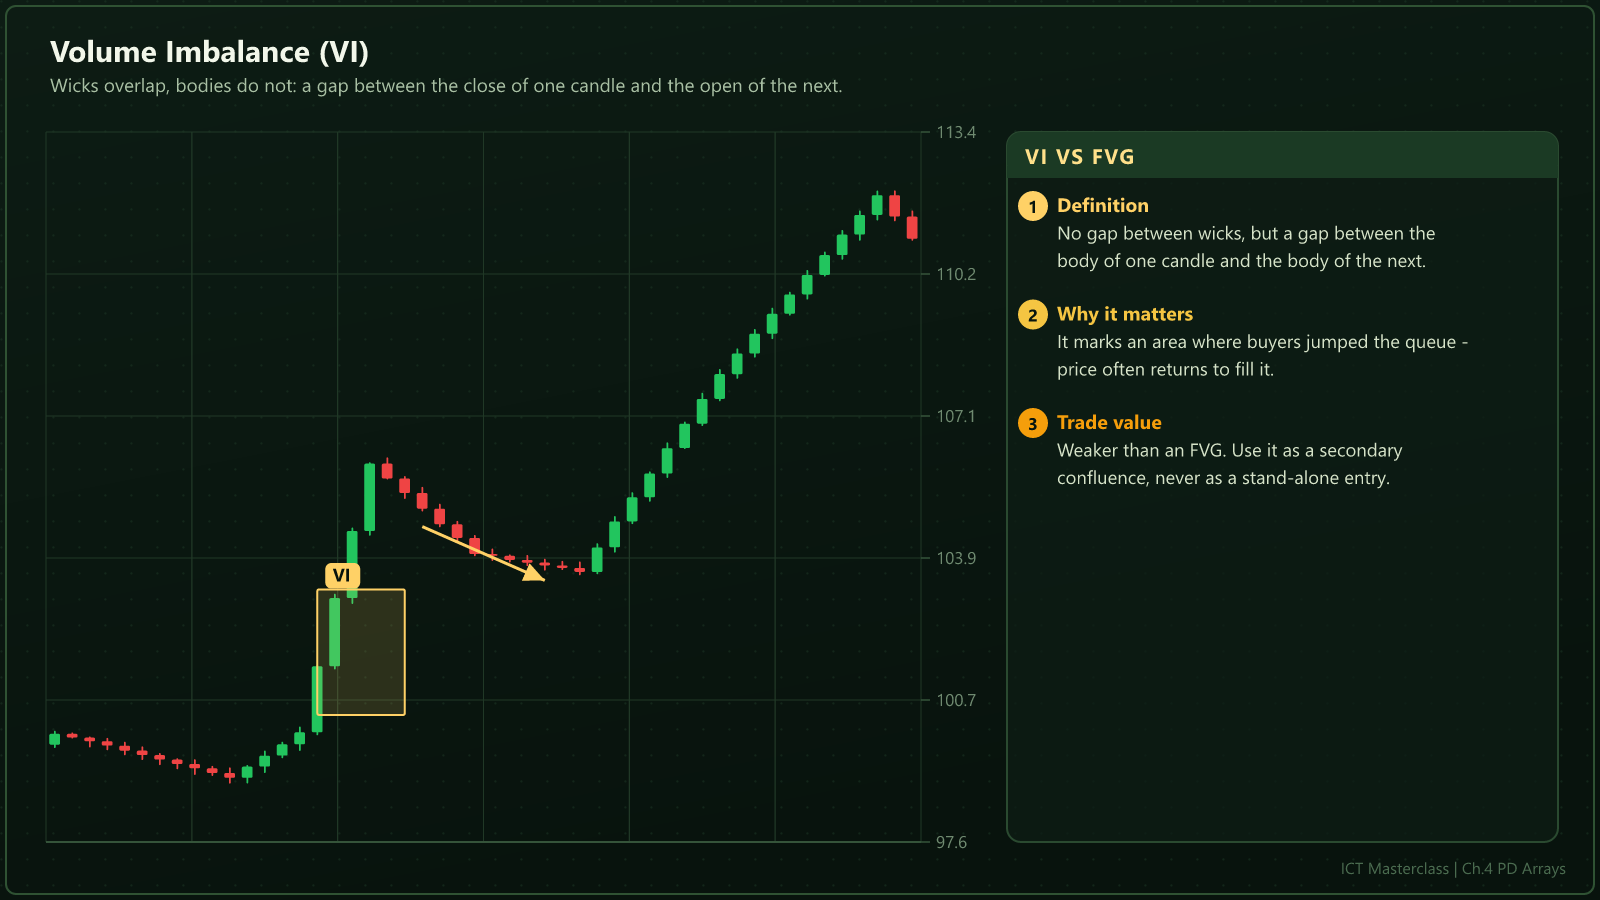
VI | Body gap while wicks overlap |
Void | A one-sided fast run with almost no trade |
Inversion FVG | A failed FVG that now works in reverse |
Optimal Trade Entry | 62 to 79 percent of the leg |
CE | The exact 50 percent of an FVG |
4.2Fair Value Gap
In a three-candle sequence, if the middle candle is so large that the bodies of candle one and three never touch, the space between them is the FVG. It means price was not balanced there, and the market tends to return.
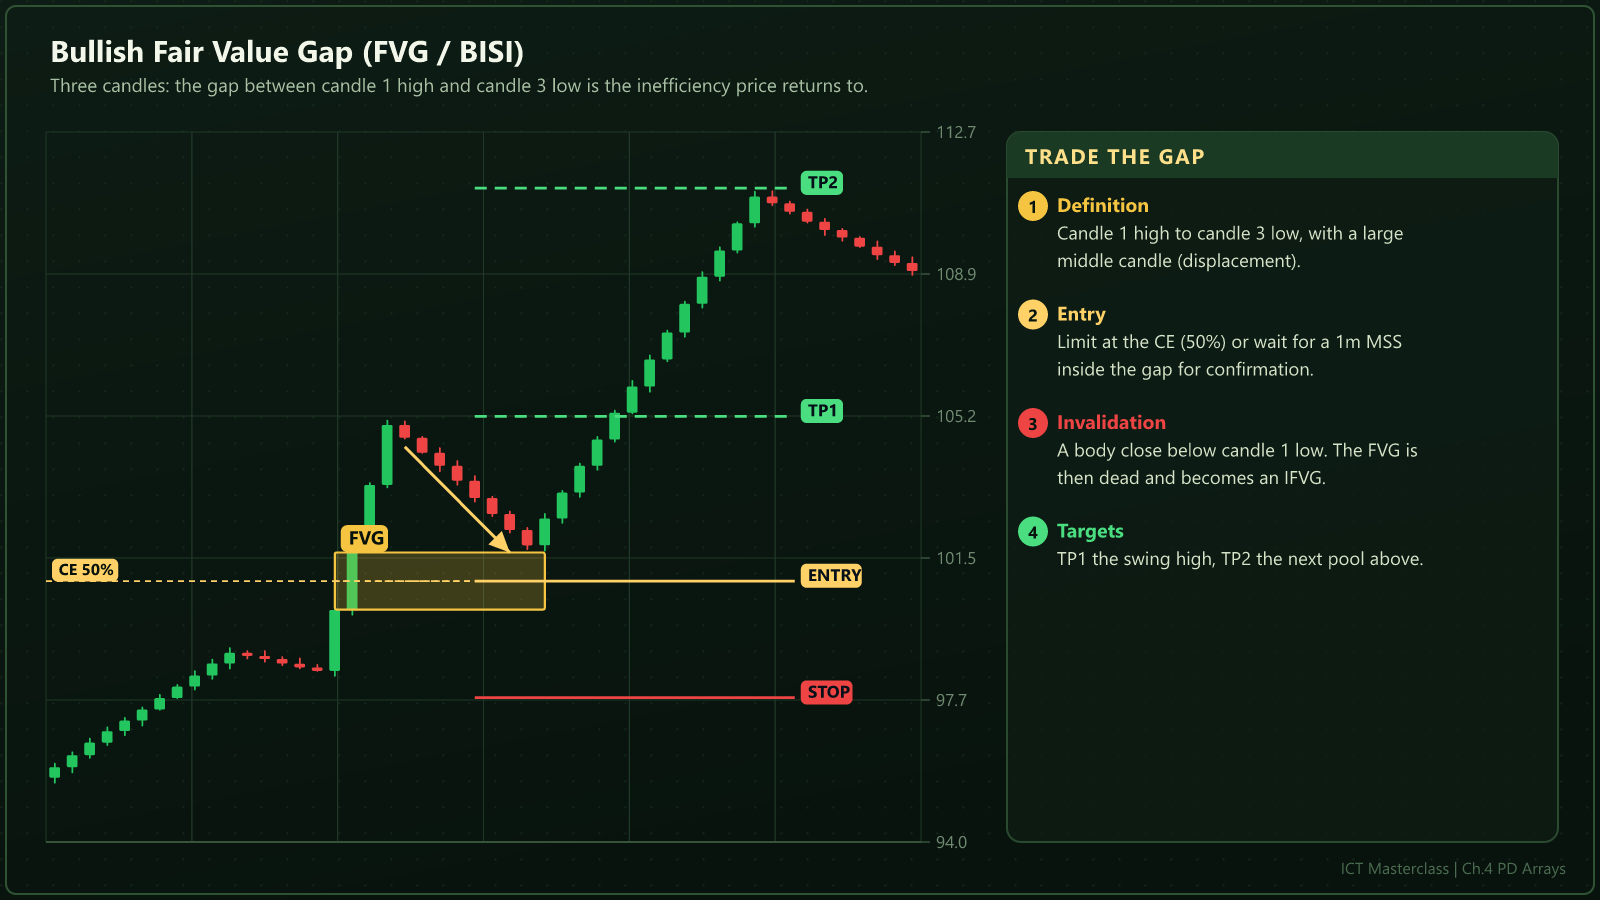
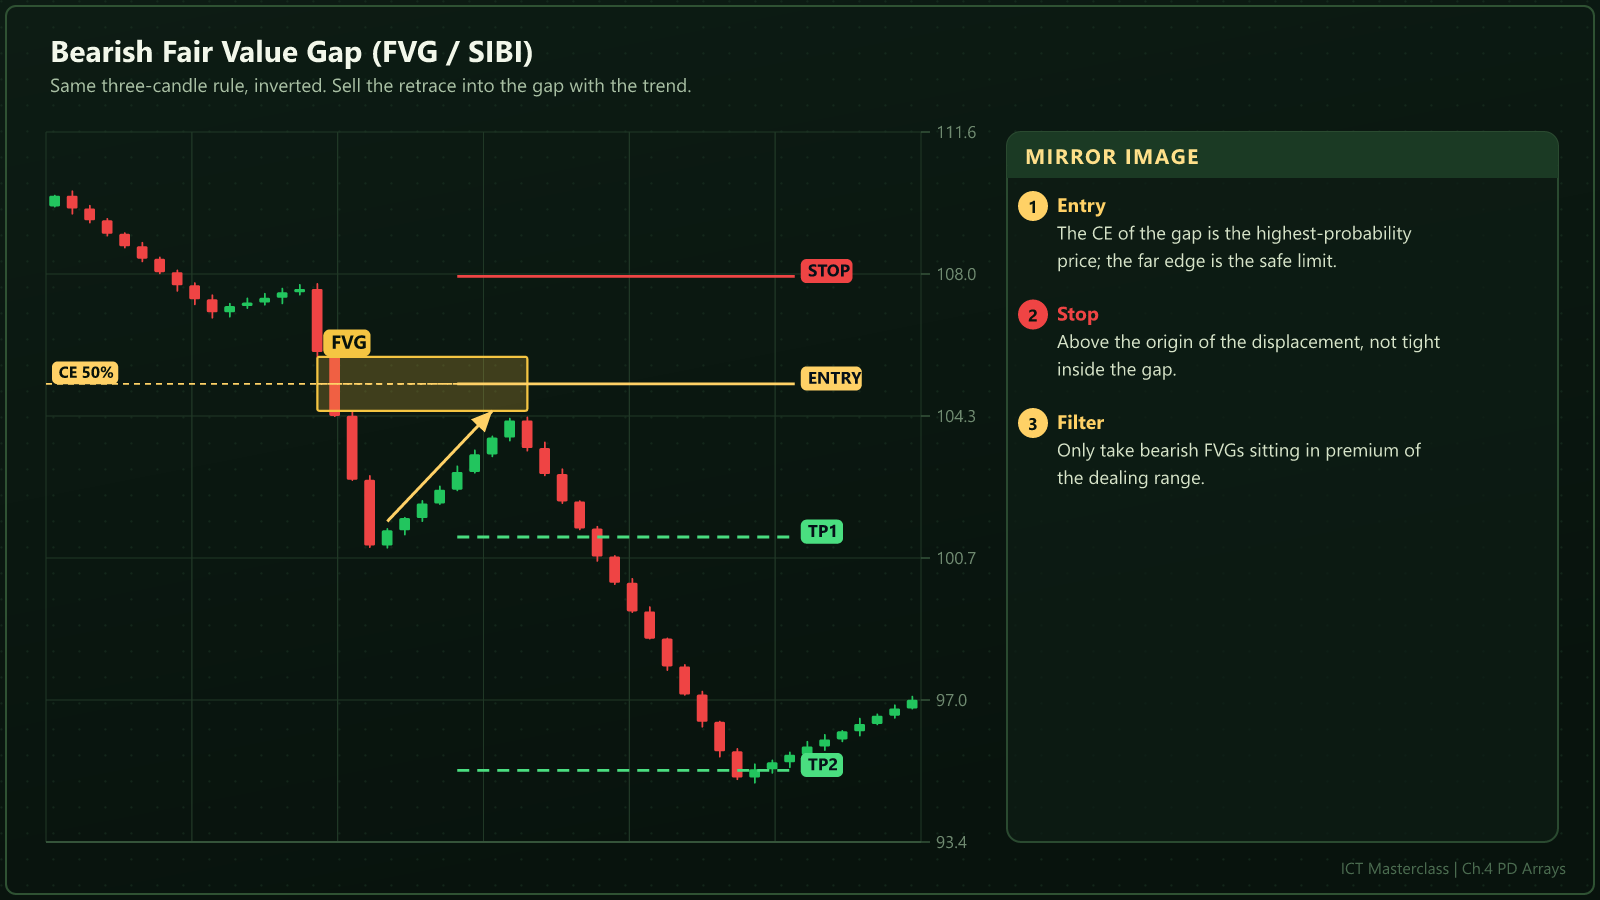
- Quality = gap size divided by average candle size. Bigger is better.
- CE - the 50 percent of the gap, the most reliable entry line.
- A smaller FVG inside the big one is nested - the strongest version.
- An FVG formed outside a killzone is usually weak.
4.3Order Block
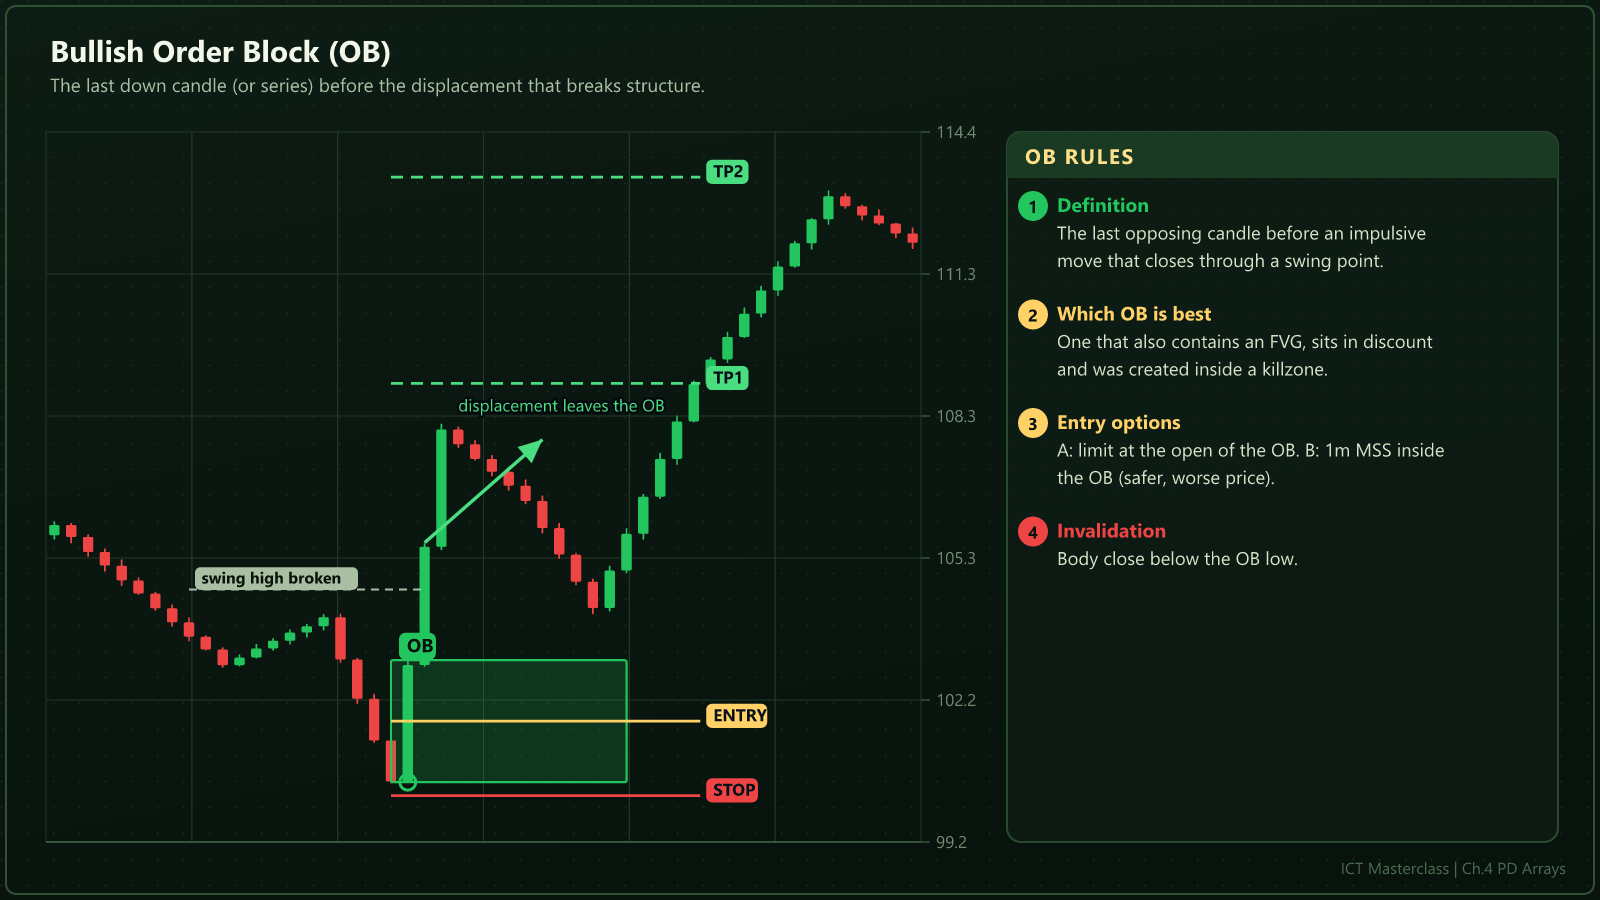
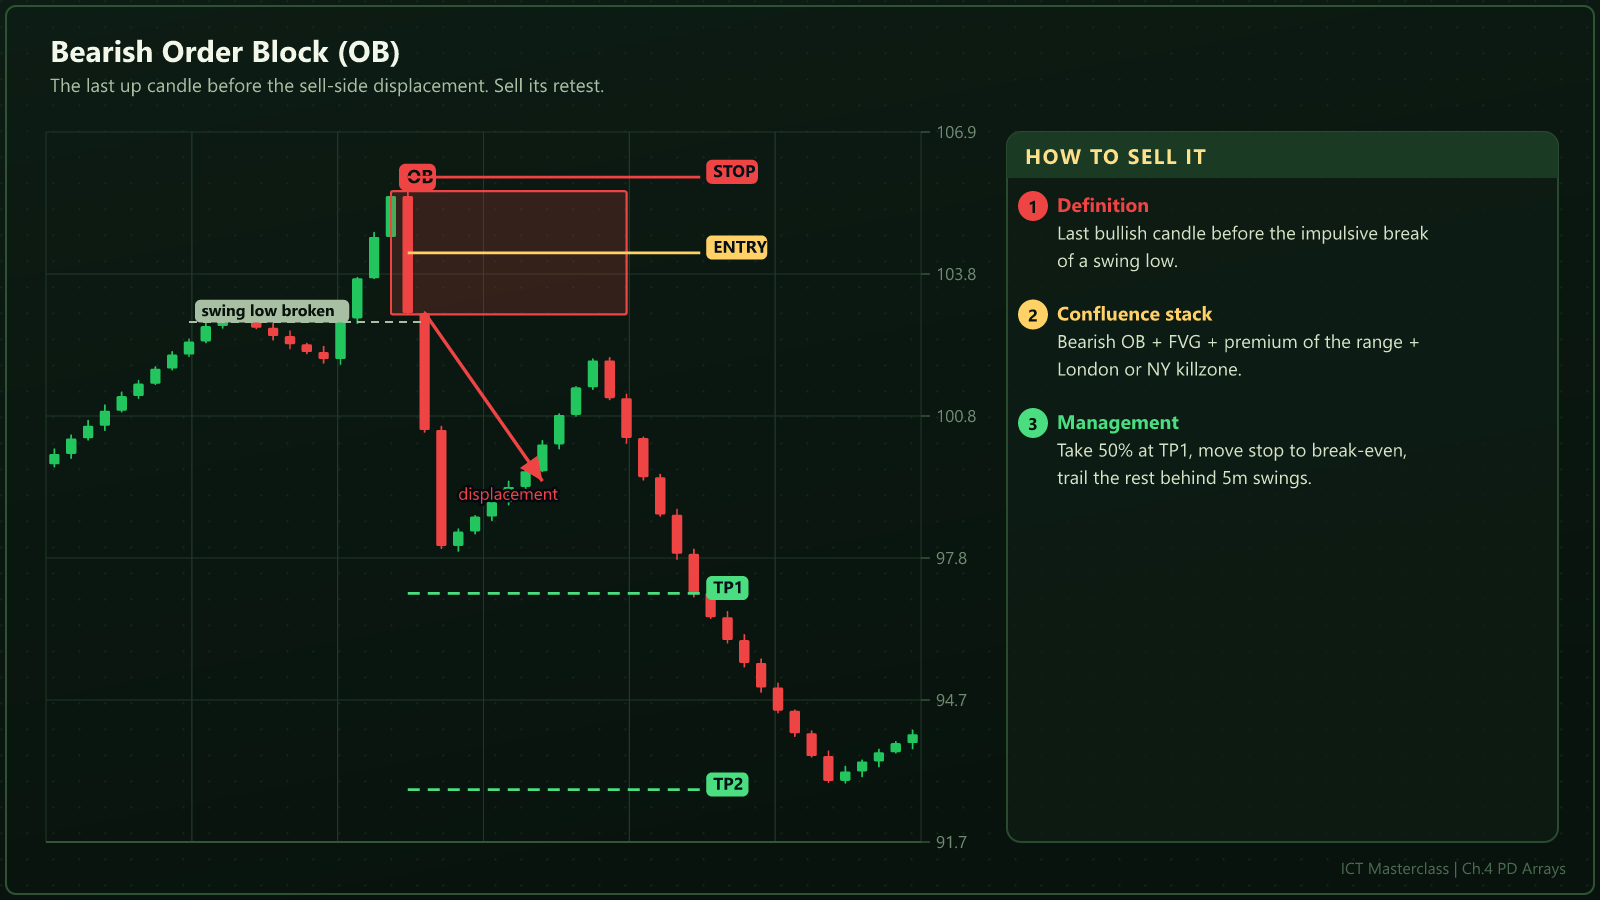
The OB is the last candle immediately before the displacement: the last green candle before a bearish move, the last red candle before a bullish move. That is where the institution parked its bulk order.
| Conditions for a good OB | Reason |
|---|---|
Displacement broke structure | Proves real orders were there |
The OB contains or touches an FVG | Two reasons meet at one price |
Correct premium or discount | An OB at the wrong price gives poor R:R |
Created inside a killzone | Orders from active hours |
First retest | Each retest weakens the OB |
4.4Breaker Block
When an OB is violated by a body close, everyone who entered there is trapped. That failed zone then works from the opposite side - that is the breaker.
4.5Mitigation Block
A mitigation block is where price returns to let trapped positions exit at break-even. It is not fresh demand like an OB; it is where old damage gets repaired.
4.6Rejection Block and Volume Imbalance
Two smaller but useful arrays. The rejection block is a cluster of long wicks - a price that kept rejecting. The volume imbalance is a body gap where wicks overlapped but bodies did not.
4.7IFVG: The Failed Gap
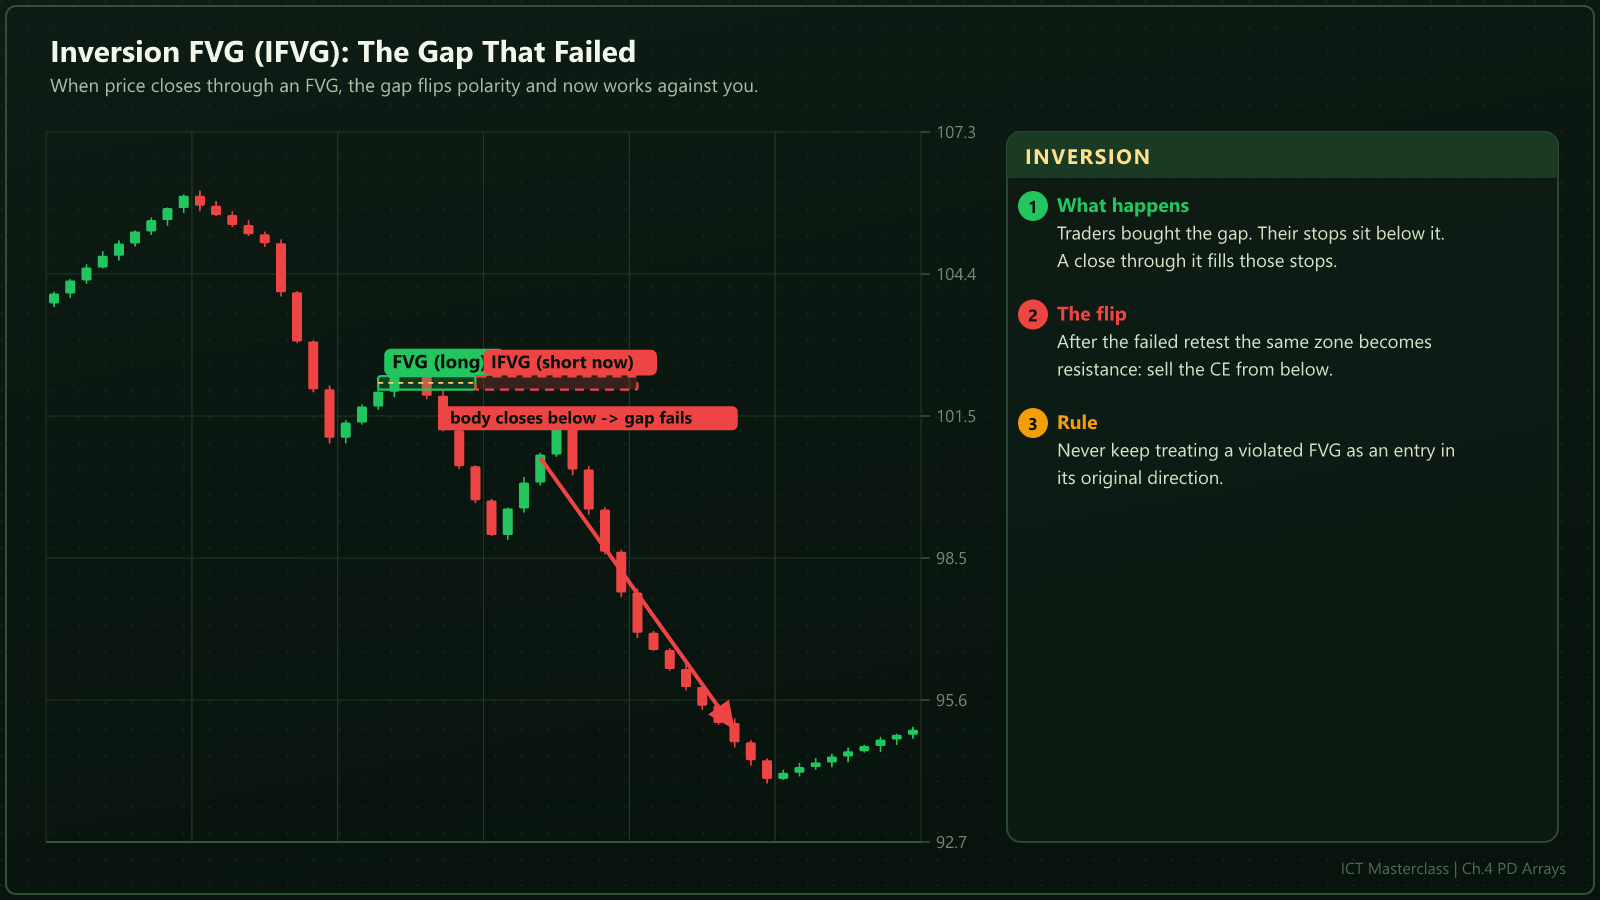
If an FVG is broken by a body close it is no longer an entry - it is now a zone in the opposite direction. This is where many traders go wrong: they keep buying an FVG that has already failed.
4.8Nested Arrays: Two Timeframes, One Price
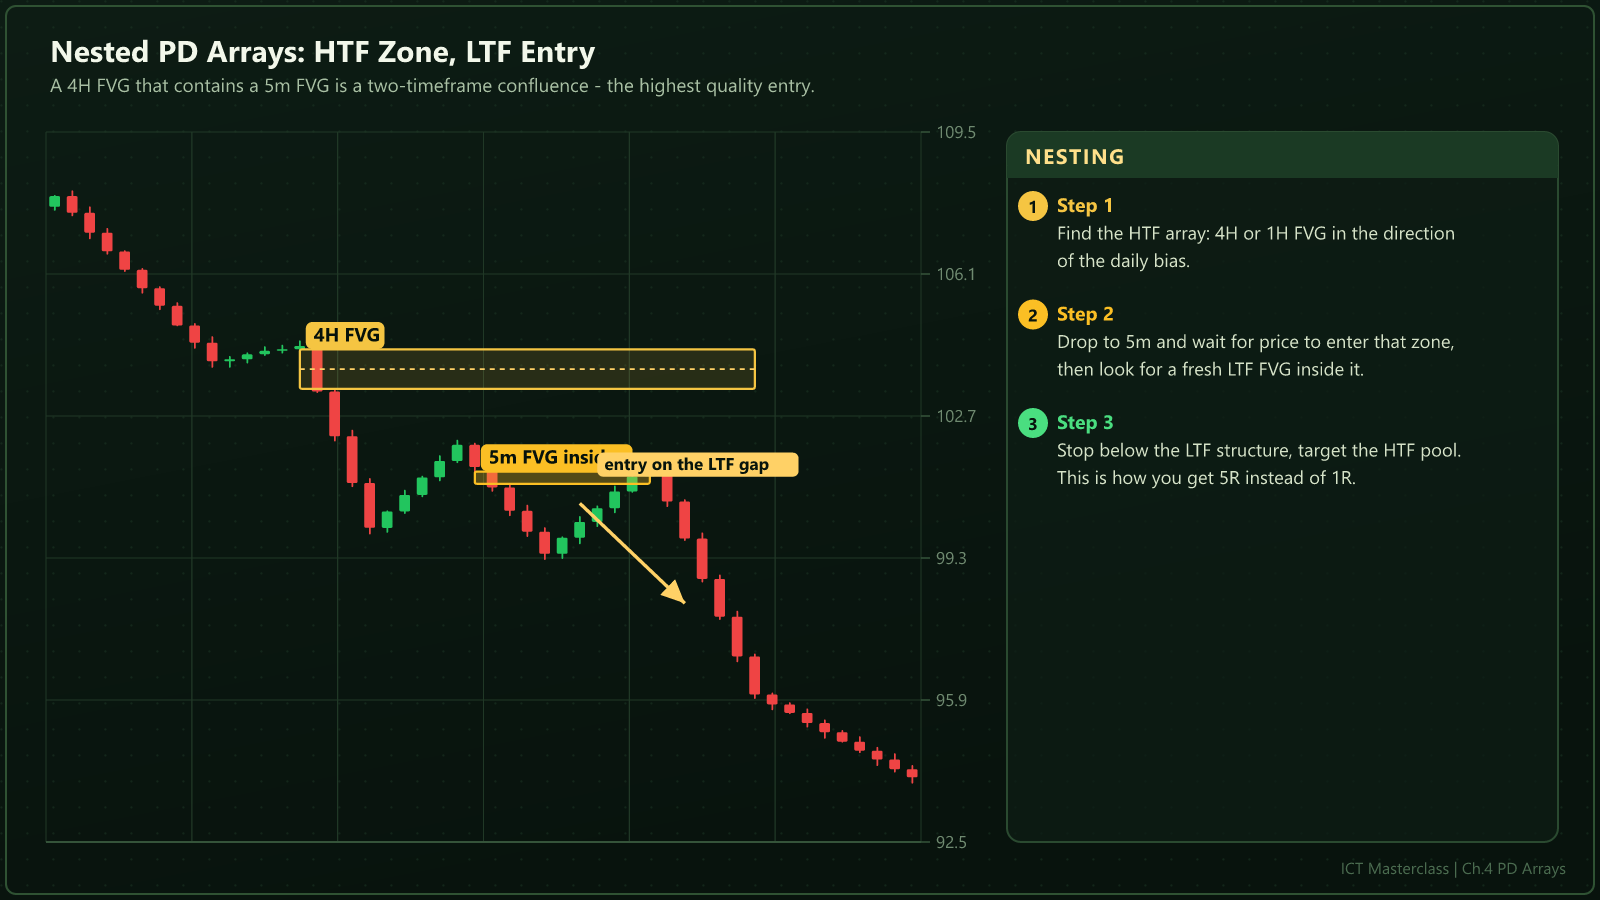
The best entry is a lower-timeframe zone inside a higher-timeframe zone: a 5-minute FVG inside a 4-hour FVG. Two kinds of traders are buying the same price.
4.9Ranking the Arrays
| Rank | Array | Why |
|---|---|---|
A+ | Nested FVG, OB and OTE at one price | Three independent reasons at one price |
A | OB plus FVG, in a killzone, in discount | All conditions met |
B | A single FVG or OB | One reason; tradeable with good R |
C | Volume imbalance, mitigation | Confluence only |
X | Liquidity void | A target, never an entry |
Educational material only · not financial advice.